Creative Controls
Master the environment, color, vibe, and camera settings to get exactly the look you want for every mockup.
In this guide
Choosing an Environment
The Environment setting determines the overall context of your mockup scene. StageFlow offers four presets, each designed for a different type of product photography:
- Studio — Clean, controlled lighting on a neutral backdrop. Perfect for products that need to be the undeniable star of the image.
- Lifestyle — Natural, real-world settings like kitchens, living rooms, or outdoor scenes. Great for showing your product in context.
- Styled Surface — Flat-lay and textured surface compositions. Think marble countertops, linen fabrics, or wooden boards with carefully arranged props.
- Color & Texture — Abstract backgrounds with rich colors and interesting textures. Ideal for bold, eye-catching listings that stand out in search results.
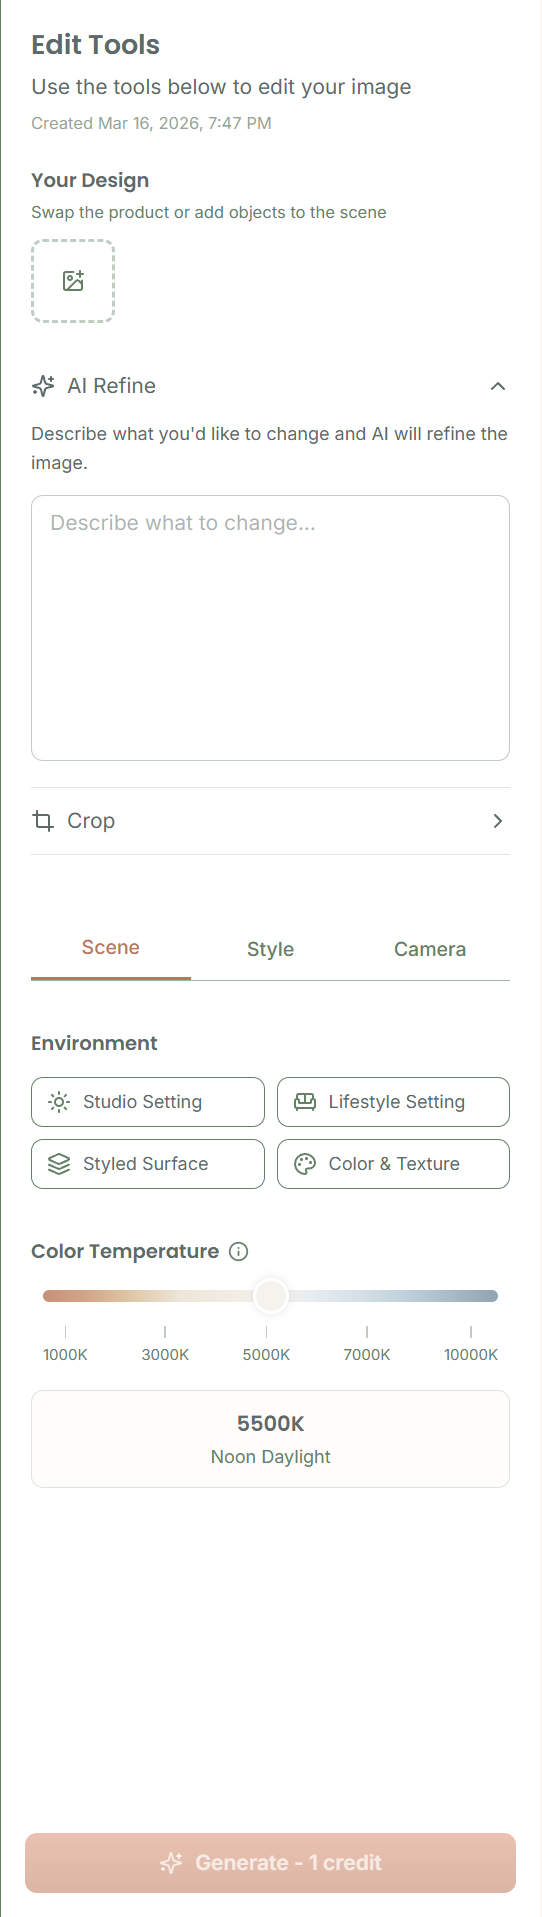
Pick the environment that best matches the mood you are going for, and let your prompt fill in the specific details.
Setting the Color Temperature
The color temperature slider controls the overall warmth or coolness of your scene, measured in Kelvin. Slide it left toward 1000K for warm, golden tones — think candlelit evenings and golden hour sunlight. Slide it right toward 10000K for cool, blue-toned lighting that feels crisp and modern.
This is a subtle but powerful control. Warm tones tend to feel cozy and inviting, which works beautifully for handmade and artisan products. Cooler tones give a clean, contemporary feel that suits minimalist or tech-adjacent items.
Tip: There is a reset button next to the slider that snaps you back to the default neutral temperature. Use it if you have been experimenting and want a fresh starting point.
Exploring the Vibe Library
The Vibe Library is a collection of curated aesthetic presets organized by style. Browse categories like Boho, Minimalism, Industrial, Cottagecore, and more — each one setting a distinct visual mood for your mockup.
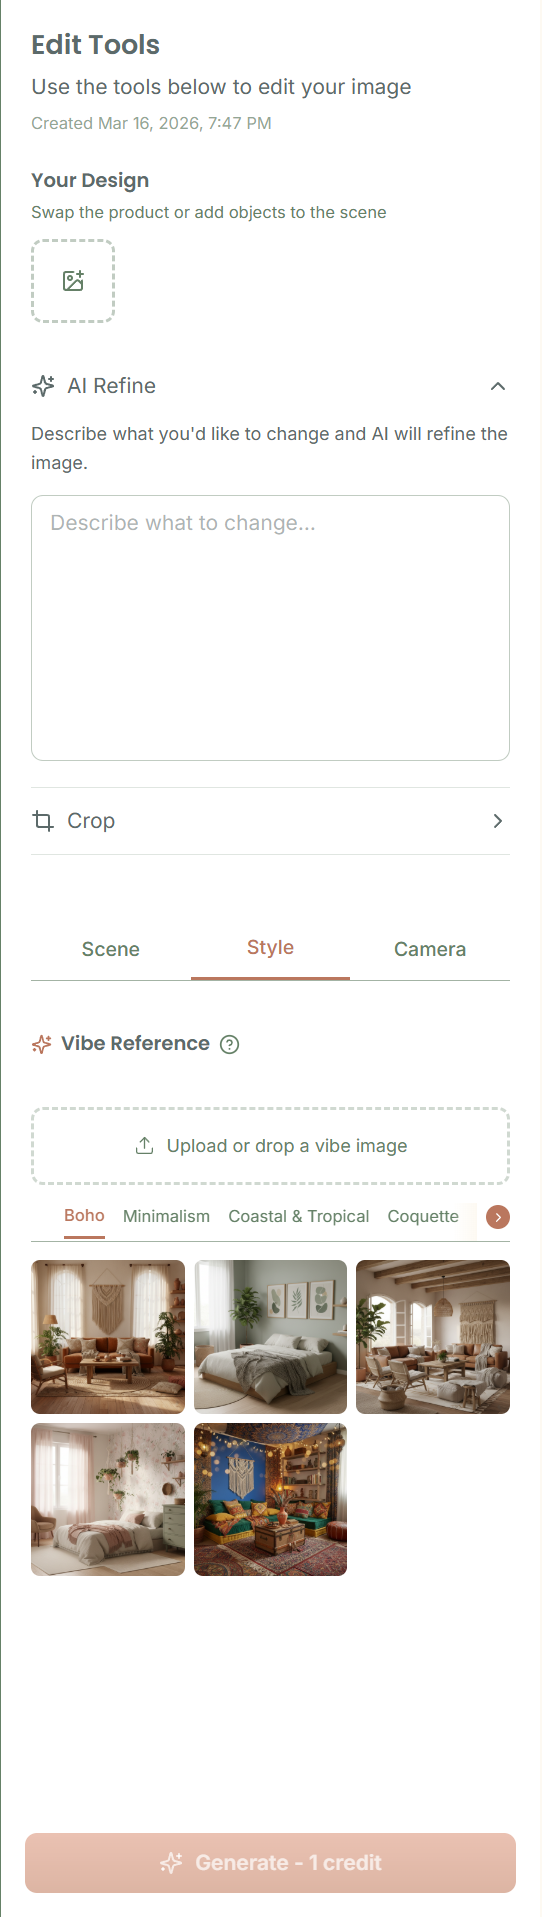
Each vibe comes with a preview thumbnail so you can see what the style looks like before selecting it. Click a vibe to apply it, and click it again to deselect. You can experiment with different vibes quickly to see which one complements your product best.
Tip: Vibes work best when they align with your product's personality. Selling hand-poured soy candles? Try Boho or Cottagecore. Minimalist jewelry? Go with Scandinavian or Clean Modern.
Uploading a Custom Vibe Image
If none of the built-in vibes quite match what you are after, you can upload your own reference image to use as a style guide. This is especially useful when you want your mockups to match an existing brand aesthetic or replicate the look of a specific photo you love.
Just upload any image that captures the mood, color palette, or composition style you want to achieve. The AI will use it as a visual reference when generating your mockup, pulling in the tones, textures, and overall feel of that image.
Tip: Great sources for custom vibe images include your own past photography, Pinterest mood boards, or brand style guide imagery. The reference does not need to feature your product — it just needs to capture the visual style you are going for.
Camera Angle & Framing
Camera angle controls let you decide the perspective of your mockup. StageFlow offers 8 angle presets that work on both the Create and Edit pages:
- Hero — Classic eye-level product shot
- Flat Lay — Overhead top-down perspective
- Detail — Zoomed in to highlight details and texture
- Dramatic — Low angle, looking up at the product
- Side — Profile view from the side
- 3/4 View — Angled three-quarter perspective
- Back — Rear view of the product
- Wide — Pulled back to show more of the scene
On the Create page, camera angle is a simple preset picker — click a preset to set your desired angle before generating. The AI will frame the scene from that perspective. Click the same preset again to deselect it and let the AI decide.
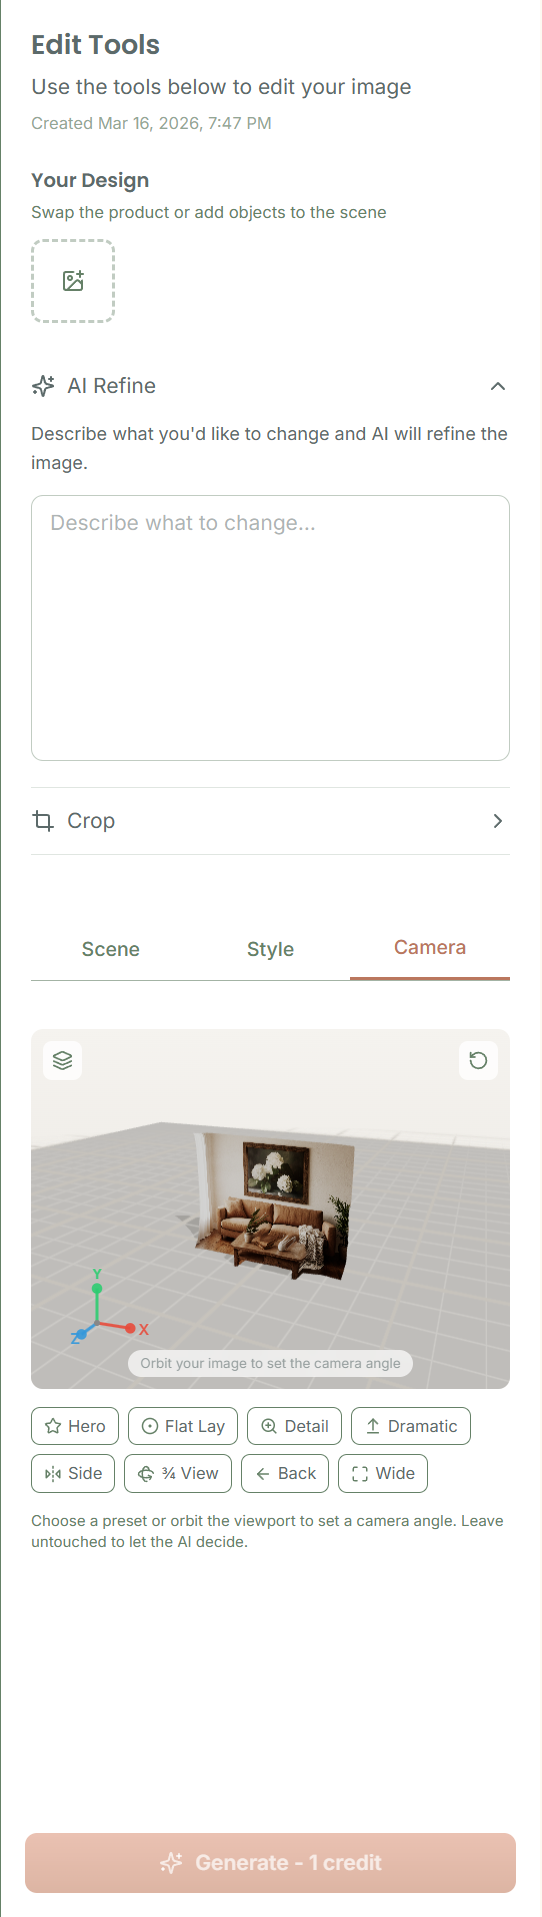
On the Edit page, after your first generation, an interactive 3D viewport becomes available. StageFlow uses depth estimation to build a 3D mesh of your scene, giving you hands-on orbit, pan, and zoom control for precise framing. The Camera tab is greyed out until you have generated a scene — it needs a real image with depth to work with.
Tip: Camera angle has the biggest impact on the overall composition of your mockup. If the result does not feel right, try changing the angle before adjusting anything else — it often makes all the difference.
Tips for Combining Controls
Each creative control is powerful on its own, but combining them is where things really come together. Here are some practical guidelines for getting the best results:
- Keep Environment and Vibe complementary. A Lifestyle environment pairs naturally with Boho or Cottagecore vibes. A Studio environment works well with Clean Modern or Minimalist vibes. Conflicting choices can confuse the AI.
- Don't overload with conflicting instructions. If your prompt says "bright outdoor scene" but your vibe is dark and moody, the AI has to pick one. Be consistent across your controls and prompt.
- Camera angle has the biggest visual impact. Start there, then layer in environment, vibe, and color temperature to fine-tune the mood.
- When in doubt, start simple. Use one or two controls for your first generation, see the result, then add more controls one at a time. This way you can see what each one contributes.
Tip: Think of the controls like seasoning a dish. A little goes a long way, and layering flavors thoughtfully produces much better results than dumping everything in at once.
Still have questions?
support@stageflow.ai